Ultimate Gaming PC Build Guide for Beginners: Your First Rig

Close-up of a colorful RGB cooling fan in a gaming PC setup.Photo: Necroform Art / Pexels

Ultimate Gaming PC Build Guide for Beginners: Your First Rig

Dive into the exciting world of PC building with our comprehensive guide, designed to make your first custom gaming rig a success.

Start Building Now

Key Takeaways

  • ✓ Building your own PC can save you money compared to pre-builts.
  • ✓ You gain full control over component selection and future upgrades.
  • ✓ The process is more straightforward than many beginners assume.
  • ✓ Understanding components improves troubleshooting skills.

How It Works

1
Plan Your Budget & Needs

Determine how much you're willing to spend and what games you want to play. This dictates your component choices and performance expectations.

2
Select Core Components

Choose your CPU, GPU, Motherboard, RAM, Storage, and Power Supply. Ensure compatibility between all selected parts for a smooth build.

3
Assemble Your PC

Carefully install each component into the PC case, following detailed instructions. This involves mounting, connecting cables, and securing parts.

4
Install OS & Drivers

Once assembled, install your operating system (e.g., Windows) and all necessary drivers for your components. This ensures optimal performance and stability.

Understanding the Core Components of Your Gaming PC

Close-up of a high-performance gaming PC showcasing RGB cooling fans, GPU, and hardware components.
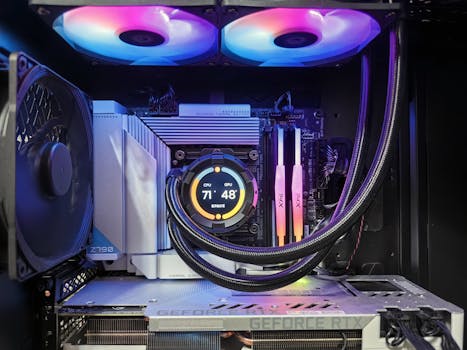
Photo: Andrey Matveev / Pexels
Embarking on your first gaming PC build can feel like deciphering a complex puzzle, but with a clear understanding of each component's role, it becomes an exciting journey. For beginners, the sheer number of options for CPUs, GPUs, and motherboards can be overwhelming. Let's break down the essential parts that make up your gaming powerhouse, focusing on what each does and why it matters for your gaming experience. At the heart of every gaming PC are the Central Processing Unit (CPU) and the Graphics Processing Unit (GPU). The CPU, often called the 'brain' of the computer, handles all general computations, game logic, and background tasks. For gaming, a good CPU ensures smooth gameplay, especially in CPU-intensive titles or when multitasking. Brands like Intel (Core i5, i7, i9) and AMD (Ryzen 5, 7, 9) offer a range of processors suitable for various budgets and performance needs. Look for processors with a good balance of core count and clock speed. The GPU, or graphics card, is arguably the most critical component for gaming. It renders all the visuals you see on your screen, from intricate textures to dynamic lighting effects. A powerful GPU is essential for high frame rates, higher resolutions (like 1440p or 4K), and graphically demanding games. NVIDIA (GeForce RTX series) and AMD (Radeon RX series) dominate the market, offering cards across all price points. When choosing, consider your target resolution, desired frame rate, and the types of games you play. For example, an RTX 4060 or RX 7600 might be excellent for 1080p gaming, while an RTX 4070 Ti or RX 7800 XT excels at 1440p. Choosing the right GPU is a decision that significantly impacts your overall gaming performance. Next, the motherboard acts as the central nervous system, connecting all your components and allowing them to communicate. It needs to be compatible with your chosen CPU (check the socket type, e.g., LGA1700 for Intel or AM5 for AMD) and support your desired RAM type (DDR4 or DDR5) and speed. Motherboards also come with various features like Wi-Fi, multiple M.2 slots for fast storage, and different port configurations. While a basic motherboard will function, investing in a slightly better one can offer more upgrade paths and features down the line. Random Access Memory (RAM) is your PC's short-term memory, holding data that the CPU needs to access quickly. For modern gaming, 16GB of DDR4 or DDR5 RAM is the sweet spot, with 32GB being ideal for future-proofing or heavy multitasking. Higher RAM speeds (measured in MHz) can also provide a small but noticeable performance boost in some games. Don't forget storage! Solid State Drives (SSDs), especially NVMe M.2 SSDs, are now the standard for gaming PCs due to their incredible speed. An NVMe SSD for your operating system and frequently played games will drastically reduce load times. A secondary SATA SSD or even a traditional Hard Disk Drive (HDD) can be used for mass storage of less-demanding games or other files. Finally, the Power Supply Unit (PSU) delivers electricity to all your components. It's crucial not to skimp on the PSU. Choose one with sufficient wattage for your components (always add a buffer), and look for an 80 PLUS efficiency rating (Bronze, Gold, Platinum) which indicates how efficiently it converts AC power to DC power, reducing heat and energy waste. A modular or semi-modular PSU can also make cable management much easier, leading to a cleaner build and better airflow. Each of these components plays a vital role, and understanding their individual contributions is the first step towards building a high-performing gaming PC.

Planning Your Budget and Selecting Compatible Parts

One of the most critical steps in any gaming PC build guide for beginners is effective budget planning and ensuring component compatibility. Without a clear budget, you risk overspending or, worse, ending up with a mismatched system that underperforms. Start by setting a realistic budget range. For a decent entry-level gaming PC that can handle 1080p gaming at respectable frame rates, you might look at a budget of €700-€1000. Mid-range builds targeting 1440p gaming or high refresh rate 1080p can fall into the €1000-€1500 range, while high-end systems for 4K gaming or extreme performance can easily exceed €1500, even reaching €2500+. Remember to allocate funds not just for the core components but also for peripherals like a monitor, keyboard, mouse, and operating system, which can add significant cost. Once your budget is established, the next crucial step is selecting compatible parts. This is where many beginners can get tripped up. The motherboard is the central piece around which all other components revolve. Its CPU socket type (e.g., Intel LGA1700, AMD AM5) dictates which processors you can use. Ensure your chosen CPU fits this socket. The motherboard also specifies the type of RAM it supports (DDR4 or DDR5) and its maximum speed. Your RAM modules must match this specification. Furthermore, check the number and type of storage slots (M.2 NVMe, SATA) and PCIe slots for your graphics card and any expansion cards. Online tools like PCPartPicker.com are invaluable resources for checking compatibility. You can select your desired components, and the tool will automatically flag any potential issues, such as an incompatible CPU socket, insufficient PSU wattage, or physical clearance problems within the case. This greatly simplifies the process and helps prevent costly mistakes. When choosing your components, try to balance the performance across all parts. For instance, pairing a top-tier GPU with a very old, slow CPU will create a bottleneck, meaning the GPU won't be able to perform at its full potential because the CPU can't feed it data fast enough. Conversely, an overpowered CPU with an entry-level GPU will also lead to an unbalanced system. Aim for a harmonious build where all major components are roughly in the same performance tier relative to your budget. Consider the future as well. While you don't need to overspend on every component, choosing a motherboard with a slightly newer chipset or a PSU with a bit more wattage than immediately needed can provide a smoother upgrade path down the line. For example, if you plan to upgrade your GPU in a couple of years, having a PSU that can handle a more powerful card without needing replacement will save you time and money. Similarly, a motherboard with multiple M.2 slots allows for easy storage expansion. This forward-thinking approach, even within a beginner's budget, can extend the lifespan and value of your custom-built gaming PC, making it a truly rewarding experience.

Step-by-Step Assembly: Bringing Your Gaming Rig to Life

With all your components in hand and compatibility confirmed, it's time for the most exciting part: assembling your gaming PC. This gaming PC build guide for beginners will walk you through the process, ensuring a smooth and successful first build. Before you begin, gather your tools: a Phillips head screwdriver (magnetic tip is a bonus), zip ties or Velcro straps for cable management, and potentially some thermal paste if your CPU cooler doesn't come with it pre-applied. It's also wise to have a clean, static-free workspace. Consider wearing an anti-static wrist strap, or at least frequently touch a grounded metal object (like your PC case) to discharge any static electricity, which can damage sensitive components. Start by installing the CPU onto the motherboard. Carefully open the CPU socket lever, align the CPU with the triangle or arrow indicator on both the CPU and the socket, and gently place it in. Do not force it; it should sit perfectly. Once seated, close the lever to secure it. Next, install the CPU cooler. If it's an air cooler, apply thermal paste (a pea-sized dot in the center of the CPU is usually sufficient if not pre-applied) and mount the heatsink, ensuring even pressure. If it's an AIO liquid cooler, install the block on the CPU and mount the radiator to an appropriate fan slot in your case. Then, install the RAM modules. Open the clips on the motherboard's RAM slots, align the notch on the RAM stick with the notch in the slot, and press firmly on both ends until the clips snap into place. Proper RAM installation is crucial for system stability. Now, it's time to install the motherboard into the PC case. First, install the I/O shield (the metal plate with cutouts for your motherboard's ports) into the back of the case if it's not integrated with your motherboard. Then, carefully lower the motherboard into the case, aligning it with the standoffs (small screws that elevate the motherboard from the case). Secure it with screws. Next up is storage: install your NVMe SSDs into the M.2 slots on the motherboard, securing them with the tiny screw provided. If you have 2.5-inch SATA SSDs or 3.5-inch HDDs, mount them in the drive bays of your case and connect them with SATA data and power cables. The power supply unit (PSU) usually mounts in the bottom or top rear of the case. Slide it into its bay and secure it with screws from the outside. Begin connecting the power cables: the large 24-pin ATX power cable to the motherboard, the 4/8-pin CPU power cable (usually at the top left of the motherboard), and PCIe power cables to your graphics card (if it requires external power). Finally, install your graphics card. Open the latch on the PCIe slot, align the GPU with the slot, and press it firmly until it clicks into place. Secure it to the case with screws. Connect all the small front panel connectors (power switch, reset switch, USB, audio) to their corresponding pins on the motherboard, referring to your motherboard manual. With all components installed and cables connected, take the time to manage your cables using zip ties or Velcro straps to improve airflow and aesthetics. This meticulous approach ensures not just a functional PC, but a beautifully built one.

Post-Build Essentials: Software, Drivers, and Troubleshooting Tips

Congratulations! You've successfully assembled your gaming PC. But the journey isn't over yet. This final section of our gaming PC build guide for beginners covers the crucial post-build essentials: installing your operating system, drivers, and some common troubleshooting tips to get you gaming smoothly. The first step after physically building your PC is to install an operating system. Windows 10 or Windows 11 are the most popular choices for gaming. You'll need a USB drive with the Windows installation media (created using Microsoft's Media Creation Tool) and a product key. Insert the USB drive, power on your PC, and access the BIOS/UEFI (usually by pressing DEL or F2 during startup). Ensure your USB drive is set as the primary boot device. Follow the on-screen prompts to install Windows on your chosen storage drive, ideally your fast NVMe SSD. Once Windows is installed, the next critical step is installing all necessary drivers. Drivers are software that allows your operating system to communicate with your hardware components. Without them, your PC won't perform optimally, and some features might not work at all. Start with your motherboard drivers, which can usually be found on the manufacturer's website (e.g., ASUS, MSI, Gigabyte). These include chipset drivers, LAN/Wi-Fi drivers, and audio drivers. Next, and most importantly for gaming, install your graphics card drivers. Download the latest drivers directly from NVIDIA's (GeForce Experience) or AMD's (Adrenalin Software) official websites. These are frequently updated for performance improvements and game compatibility. Also, ensure your monitor drivers are installed if applicable, and any peripheral drivers for your keyboard, mouse, or headset. Keeping your drivers up to date is an ongoing process that ensures the best gaming performance and system stability. Even with careful planning, beginners might encounter a few hiccups. Here are some common troubleshooting tips: * **PC won't POST (Power-On Self-Test):** This means no display on the monitor. Check all power connections (24-pin ATX, 8-pin CPU, PCIe power to GPU). Reseat your RAM modules and graphics card. Ensure your monitor is plugged into the graphics card, not the motherboard's integrated graphics ports. * **No display, but fans spin:** This often points to RAM or GPU issues. Try booting with only one RAM stick, testing each slot. Reseat the GPU. If your CPU has integrated graphics, try removing the dedicated GPU and connecting your monitor to the motherboard. * **Windows won't install on SSD:** Ensure the drive is properly connected and recognized in the BIOS. You might need to format the drive during the Windows installation process. * **High temperatures or fan noise:** Double-check your CPU cooler installation and thermal paste application. Ensure case fans are oriented correctly for good airflow (intake front/bottom, exhaust rear/top). Monitor temperatures with software like HWMonitor. * **Games crashing or poor performance:** Ensure all drivers (especially GPU) are up to date. Check for adequate PSU wattage. Monitor component temperatures. These steps will help you quickly diagnose and resolve most issues, getting you into your favorite games faster.

Comparison

FeatureBudget Build (€700-€1000)Mid-Range Build (€1000-€1500)High-End Build (€1500+)
Target Resolution1080p (High settings)1440p (High settings)4K or 1440p (Ultra settings)
CPU (Example)Ryzen 5 5600 or i5-12400FRyzen 7 7700X or i7-13700FRyzen 9 7900X3D or i9-14900K
GPU (Example)RX 6600 or RTX 3050RX 7800 XT or RTX 4070RX 7900 XTX or RTX 4080 Super
RAM16GB DDR4 (3200MHz)32GB DDR4/DDR5 (3600MHz/6000MHz)32GB/64GB DDR5 (6000MHz+)
Storage500GB NVMe SSD1TB NVMe SSD2TB+ NVMe SSD
PSU550-650W 80+ Bronze750W 80+ Gold850W+ 80+ Gold/Platinum

What Our Readers Say

5 ★★★★★

"This gaming PC build guide for beginners was a lifesaver! I always thought building a PC was too complicated, but the step-by-step instructions made it incredibly easy. My new rig runs Cyberpunk 2077 beautifully."

5 ★★★★★

"As a first-timer, I really appreciated the clear explanations of each component. The compatibility advice saved me from making expensive mistakes, and now I have a custom PC that exactly fits my needs and budget."

5 ★★★★★

"Following this guide, I built my first gaming PC in just one afternoon. It was a fantastic learning experience, and I ended up saving about €300 compared to a pre-built system with similar specs. Highly recommend!"

4 ★★★★☆

"The guide was mostly excellent, though I wish there were a few more specific budget build examples. Still, it gave me the confidence to tackle the project, and my PC is performing great for all my favorite games."

5 ★★★★★

"I used this guide to help my teenage son build his first PC. It was a great bonding experience, and he learned so much about technology. The PC is a beast, running all the latest titles without a hitch!"

Frequently Asked Questions

What's the most common mistake beginners make when building a gaming PC?
The most common mistake is often neglecting component compatibility, especially between the CPU and motherboard socket, or not providing enough power with an undersized PSU. Another frequent issue is forgetting to install all necessary drivers after the build is complete, leading to poor performance or stability issues.
Is it really cheaper to build a gaming PC than to buy a pre-built one?
In most cases, yes, building your own PC is cheaper than buying a pre-built system with equivalent specifications. This is because you avoid the labor costs and profit margins of system integrators. You also have full control over component quality, ensuring you don't overpay for generic or lower-tier parts often found in pre-builts.
How do I know if my components are compatible before I buy them?
Utilize online PC building tools like PCPartPicker.com. These websites allow you to select components, and they automatically check for compatibility issues, flagging potential problems between your CPU, motherboard, RAM, and other parts. Always double-check CPU socket types and RAM standards (DDR4 vs. DDR5).
What's a reasonable budget for a first-time gaming PC build in Germany?
For a solid entry-level gaming PC capable of 1080p gaming, a budget of €700-€1000 is realistic. For a mid-range system targeting 1440p gaming or high refresh rates, expect to spend €1000-€1500. High-end builds for 4K gaming will typically start from €1500 and go upwards.
Should I prioritize a better CPU or GPU for gaming?
For most modern games, the GPU (graphics card) is the single most important component for gaming performance. It handles the rendering of all visuals. While a good CPU is necessary to avoid bottlenecks, investing a larger portion of your budget into a more powerful GPU will generally yield greater frame rate improvements in games.
Who is this gaming PC build guide for beginners best suited for?
This guide is perfectly suited for anyone who has never built a PC before but is eager to learn. It's for gamers who want to save money, understand their hardware better, and have the satisfaction of building their own high-performance machine. It assumes no prior technical knowledge beyond basic computer usage.
What are the risks of building a PC myself if I'm a beginner?
The primary risks involve static electricity damaging components (easily mitigated with an anti-static wrist strap), incorrect component installation leading to non-functional parts, or compatibility issues. However, by following detailed guides, watching tutorials, and using compatibility checkers, these risks are significantly reduced and manageable.
What future trends should I consider when building a gaming PC today?
Consider the shift towards DDR5 RAM and newer CPU sockets (like AMD's AM5) for better future upgrade paths. Also, monitor the evolution of GPU technologies and power efficiency. Investing in a slightly higher wattage PSU than immediately needed can accommodate future, more powerful graphics card upgrades.

Ready to transform your gaming experience? This gaming PC build guide for beginners provides all the knowledge and confidence you need. Take the leap, build your dream machine, and dive into the world of custom PC gaming today!

Topics: gaming pc build guide for beginnerscustom gaming pc deutschlandpc components explaineddiy gaming computerbudget gaming pc build
Leo List
Brampton weed
Adultwork